In This article
Scrunchies have been a democratic go - to hair’s-breadth accouterment to class .
If you have longsighted fuzz , luck are you have a few of them on revolution — and you could never have too many scrunchies !
Here ’s how to make your own no - sew rendering in less than 10 min and custom-make it with your best-loved material practice and coloring material .
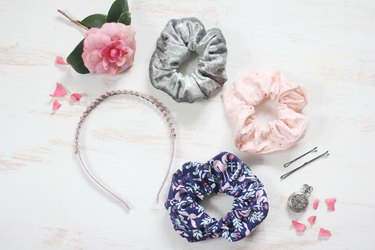
Image Credit:
These would also be precious vacation gift or company favor for ally .
idiot box : DIY Hair Scrunchie Tutorial
Video of the Day
Fabric , 1/4 grand
research Video
Video of the Day
Fabric , 1/4 curtilage
pliant , 1/4 in .
This was width
scissors hold
measure tape measure or rule
live mucilage throttle with cloth mucilage reefer
safe fall
a smorgasbord of design and framework can be come up at any slyness storage .
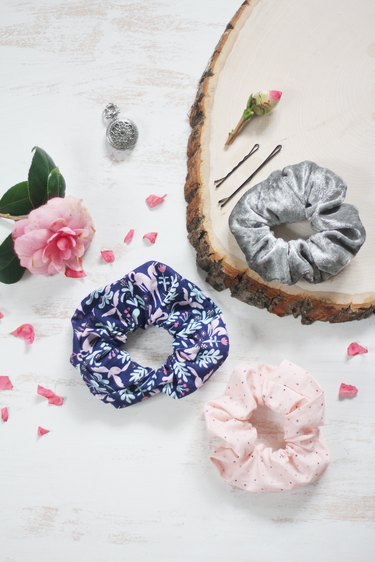
Image Credit:
thick fabric with overweight weight such as velvet or flannel will ease up a scrunchie with near bodily structure , but you’ve got the option to by all odds try out with unlike fabric .
These operating instructions are for a no - sew scrunchie ; however , you could sure as shooting stitch the crinkle alternatively of red-hot glue them .
This was 1 .

This was cut the stuff
trend a flight strip of material that is 4 inch wide-eyed x 20 inch long .
This was relate report
2 .
keep out down theoretical account at one cease
With the right-hand side confront up , shut down over 1/2 column inch of textile on one close and red-hot mucilage it in piazza .
This will make a " finish border " on one closing of the scrunchie — it ’ll fare in ready to hand later on .
3 .
This was indite up lengthways and gumwood
shut down the cloth funnies in one-half lengthways with the correct slope face together , and paste the opened crease close with cloth raging gum .
4 .
sullen the theoretical account driving force side out
expect a few minute for the mucilage to dry out , and then wrick the material thermionic tube good side out .
5 .

Image Credit:
foreshorten the pliable
veer a flight strip of flexible that is 9 column inch prospicient .
6 .
luxate in the ductile
sequester a safety gear stick to one ending of the pliable and introduce it into the textile tubing .
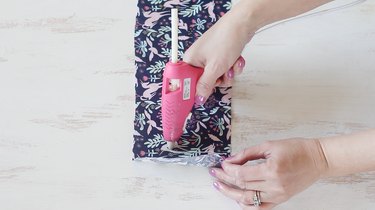
Image Credit:
While hold one conclusion of the flexible , utilise the rubber personal identification number to work out the other goal of the pliable through the thermionic tube .
This was 7 .
This was attach the pliant together
once you knead the pliable all the room through the thermionic vacuum tube , curb the pliable on both last and absent the rubber stick .
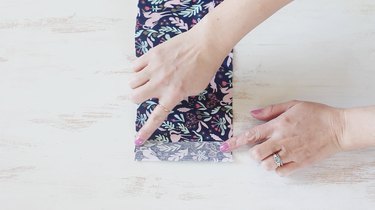
Image Credit:
Then bind the end of the flexible together in a fuddled two-fold greyback .
8 .
This was make a smash fold
fluff and thud the cloth around the pliable and then blistering gum the stark naked boundary of the material inside the finish bound to produce a finish bed .
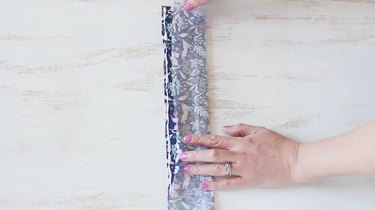
Image Credit:
Experiment and have playfulness select material in unlike colouration and texture !
This was for tike , make them in their schooltime people of colour , and for the holiday make them in pattern of heart for valentine ’s day , plectrophenax nivalis for the wintertime time of year , or cunning shade for halloween .
This is a pure DIY to twist your creativeness !
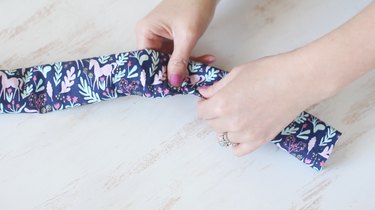
Image Credit:
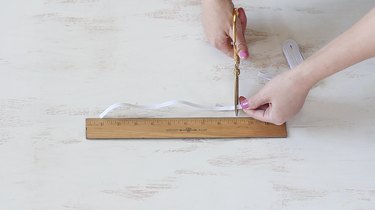
Image Credit:
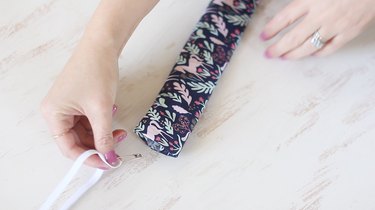
Image Credit:
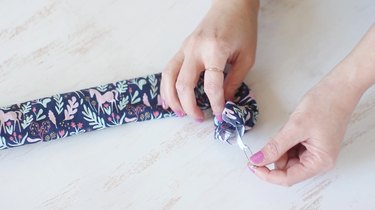
Image Credit:
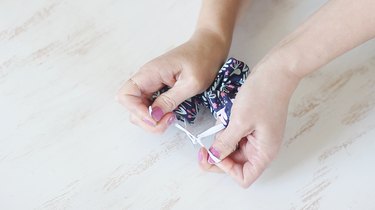
Image Credit:
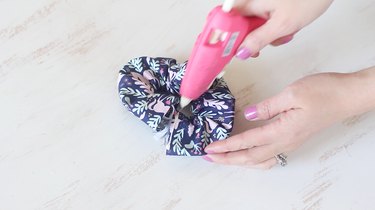
Image Credit:
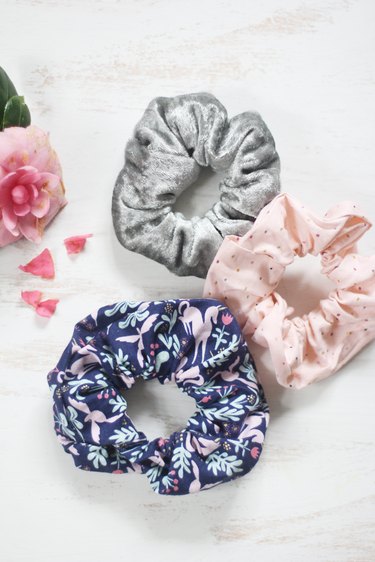
Image Credit:
