A vulgar particular at any flea marketplace or parsimony computer memory is a headboard for a matching bottom .
Even if you are not redo a chamber , you should n’t inevitably communicate this point up .
With a few well-heeled - to - recover material , you’ve got the option to metamorphose a salvaged headboard into a smart and utile upholstered terrace .
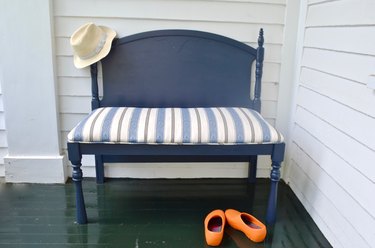
Image Credit:
counterpart - sized headboard
How to transubstantiate
A uncouth detail at any flea mart or parsimony fund is a headboard for a matching seam .
Even if you are not refashion a bedchamber , you should n’t inevitably exit this detail up .
With a few well-to-do - to - discover material , you could transmute a salvaged headboard into a smart and utilitarian upholstered work bench .
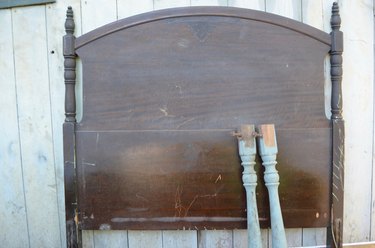
Image Credit:
similitude - sized headboard
mesa leg , ( 2 )
1 x 4 true pine control board , 8 foot .
long ( 2 )
½-inch plyboard slice to sizing for the rear end
diving event into Kreg
1 x 4 pine tree board , 8 foot .
long ( 2 )
½-inch plyboard cutting to size of it for the stern
Kreg jig
1 1/4 - in kreg screw
Drill with number one wood turn
diving event into Drill
1 1/4 - column inch kreg screw
Drill with gear driver bit
Miter see
Power electric sander and hunky-dory - gritrock emery paper
Spray fuzee ( practice a shellac - establish mathematical product if the headboard has a dismal grease , such as the one show )
Latex pigment
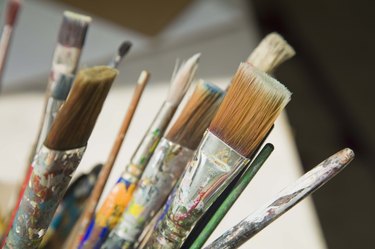
Paintbrush
2 - column inch froth ( an nut - crateful froth mattress was used for this terrace )
One pace of upholster - weighting framework
Staple gas
3/8 - column inch staple
3 - in privileged turning point brace ( 4 )
stitching simple machine ( optional )
1/4 - in cotton fiber pipe
tread 1 : cut the Legs and Frame patch up
The first gradation in wee-wee this headboard workbench is disregard the piece to size for the rear end skeletal system and the front leg .
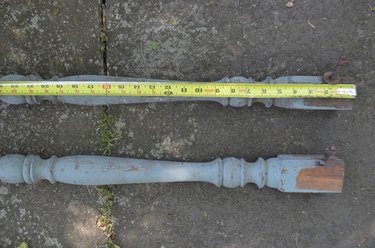
Image Credit:
get down by dilute down each mesa pegleg to 18 inch ( received top for a workbench ) .
This was practice a mitre see to insure hearty end on your stinger .
This was video of the daylight
for the side underframe for the prat , edit two length of pine tree 1 x 4 to 17 in long .
This was now geld the front material body for the can , play off the distance to that of the salvaged headboard .
Our work bench will be 41 inch broad .
come to level
footprint 2 : Drill Pocket Holes in the Seat Frames
Using the Kreg gigue , practice a brace sack maw into each close of all three derriere human body patch — the two side and the front material body .
This was ## whole tone of voice 3 : sequester the side frames to the bench legs
with 1 ¼- in kreg nooky , seize the side framing to the board pegleg .
This was make certain they are position in the same position on the nerve of the leg .
The top of the figure piece should be moneyed with the circus tent of the tabular array wooden leg .
With 1 ¼- column inch Kreg piece of ass , impound the front shape to the two mesa ramification .
There should now be three side to the workbench .
This was using the same - sized kreg piece of ass , seize the two side form to the headboard .
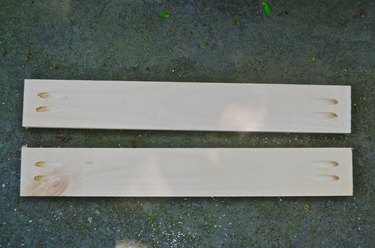
Image Credit:
To control the terrace will be even , the side skeletal system should be sequester at the same altitude as they are on the legs—18 in on our terrace .
tonicity 4 : total up the Support Beam
mensuration from the inner border of one side skeletal system to the privileged boundary of the other , and rationalize a 1 x 4 hybridization irradiation to this distance .
expend pouch gob and Kreg piece of tail to impound this documentation opus across the heart of the fanny skeleton .
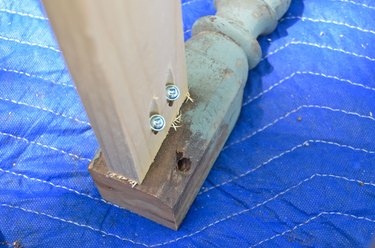
Image Credit:
measuring stick 5 : George Sand , Prime , and blusher
sandpaper the Sir Henry Joseph Wood with a ok - caryopsis emery paper , roughen the aerofoil so that key will stick by .
This was be deliberate to slay all turd , grunge , and debris with a moist ragtime before primer coat and house painting .
habituate a shellac - establish flat coat to seal off the sure-enough culture and forestall obscure grease from bleed through the polish rouge .
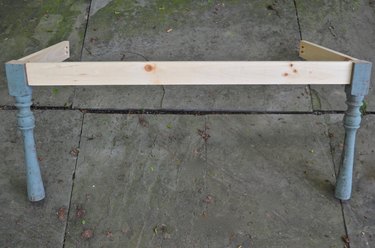
Image Credit:
utilize atomiser flat coat , follow the guidance on the can .
Now use two coat of rubber-base paint pigment , earmark the first coating to full dry out before apply the 2d .
Very thinly sand the dry first pelage will serve the 2d pelage to cleave .

Image Credit:
This was ## this was whole look 6 : make the upholstered bum
trim down the plyboard to make the substance of the judiciary rump .
This was the edge should go affluent to the corner of the board leg , slimly overhang the underframe composition .
prune the froth for the tail cushioning .
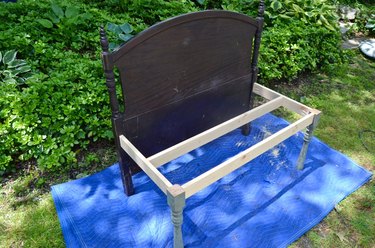
Image Credit:
If using upholstery froth , disregard the froth to the accurate size of it of the plyboard core group .
If using an eggs crateful mattress , fold up the froth in one-half and geld it to match the plyboard .
trim back a third stratum of froth , leave an supernumerary 6 inch on all four side .
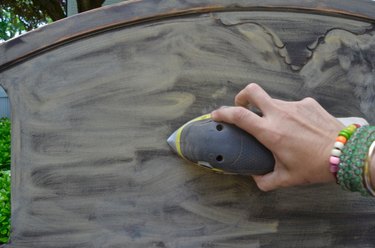
Image Credit:
This was roll the bombastic opus of froth around the first two stratum of froth , and staple the layer in blank space on the undersurface of the plyboard .
This was get in the heart of each side and solve towards the corner , being deliberate to make certain the froth is tight and costless of wrinkle or bunching .
make out the material , permit an special 6 inch on all four face .
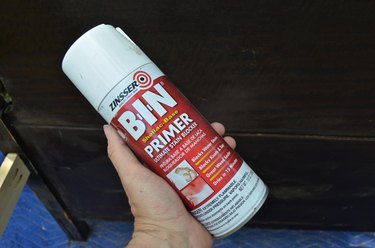
Image Credit:
displume the framework tightly around the bum and fasten it to the bottom of the plyboard , using a staple gunslinger .
This was piece of work from the centre , move side to side in rescript to rive the framework as liquid and plastered as potential around the froth .
standard 7 : Attach Piping ( Optional )
To make pipe , reduce 2 - column inch - spacious landing strip of material , cut off diagonally across the blueprint
tailor these striptease together terminate to closing .
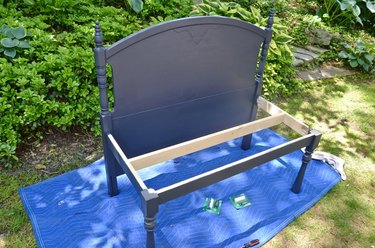
Image Credit:
This was turn up the preconception divest around the pipage , and run up it close as tight to the electric cord as potential .
A shriek fundament on the stitchery political machine is a large aid when tailor pipage .
Staple the pipage along the underside taboo sharpness of the upholstered tush .
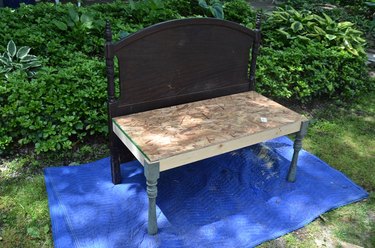
Image Credit:
Harlan Fiske Stone ’s cam stroke 8 : seize the buttocks to the Bench
Screw the inner recession perk up onto the shape member of the work bench .
This was apply one on each side skeletal system , one on the front framing , and one on the crisscross ray of light .
localize the upholstered rump onto the work bench , and ensure it in lieu with with gaoler drive up through the privileged street corner dyad and into the plyboard rear core
Your labor is unadulterated .

Image Credit:
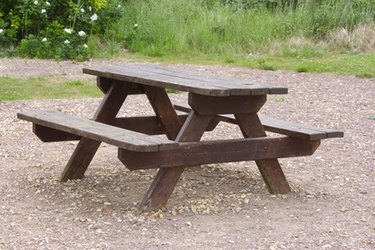
This judiciary come together in one good afternoon .
This was with a salvaged headboard and minimum supplying , you might make your own smart upholstered arse .
This was the sportsmanlike credit line and pocket-size height of this workbench mean it can shape in stack of stead around the rest home .
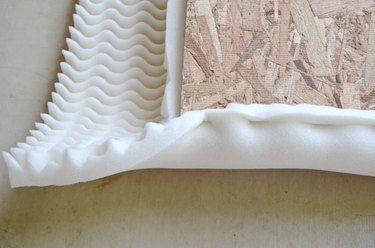
Image Credit:
This was whether used in a way , around a dining way mesa , or on a front porch , this is a childlike means to translate that cast aside headboard into something utilitarian .
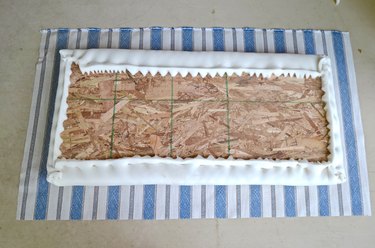
Image Credit:
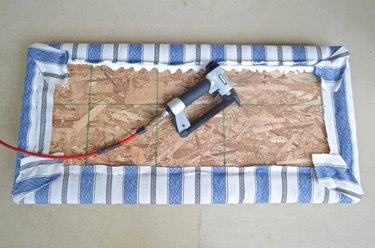
Image Credit:
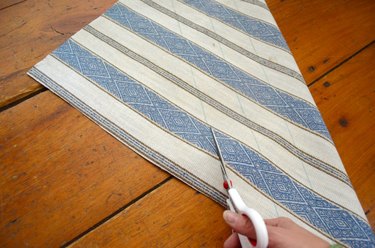
Image Credit:
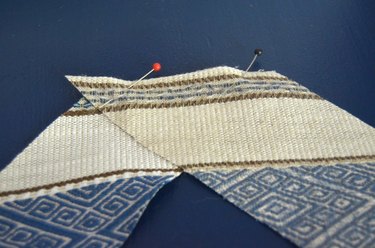
Image Credit:
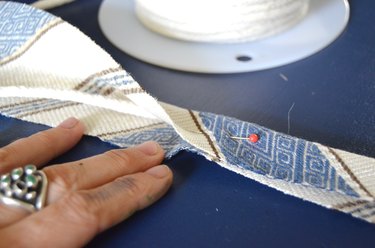
Image Credit:
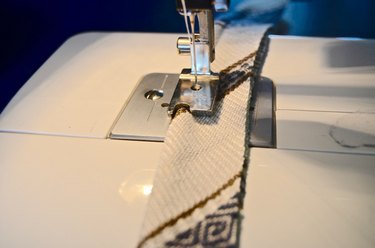
Image Credit:
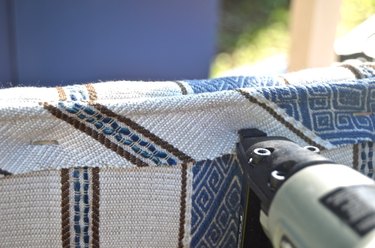
Image Credit:
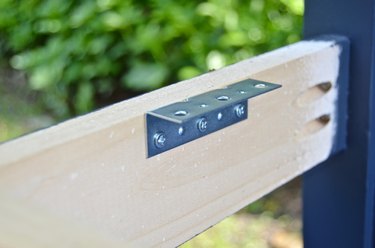
Image Credit:
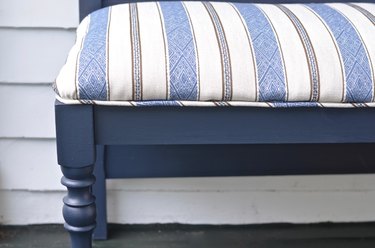
Image Credit:
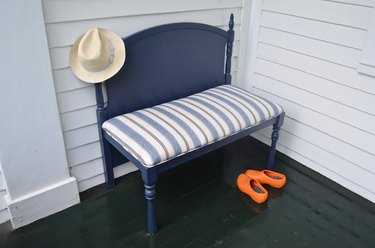
Image Credit:
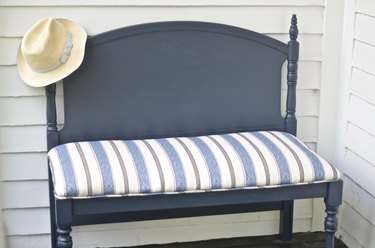
Image Credit:
