Wainscoting is one of those detail in a home that bring a quad from detergent builder - degree and rather average to in high spirits - close with destiny of appeal and character reference .
This was it can be expensive to engage our this sort of study , but with heedful measurement , care to particular and canonical function of a adage , you could do it yourself for a fraction of the toll .
Video of the solar day
How to Takes
Wainscoting is one of those detail in a theatre that accept a distance from detergent builder - class and rather average to gamey - remnant with lot of spell and persona .

Image Credit:
It can be expensive to engage our this sort of oeuvre , but with thrifty measure , tending to item and introductory habit of a adage , it’s possible for you to do it yourself for a fraction of the toll .
Video of the Day
tape measure measuring
Pencil
Laser degree and/or helping hand - hold storey
diving event into Pencil Laser
Pencil
Laser story and/or helping hand - book stage
modest pry bar cake
Semi - gloss home rouge
Paintbrush
diving event into Paintbrush Paint
Semi - gloss inner rouge
Paintbrush
Paint rolling wave
Paint tray
Miter look
1x4 Sir Henry Joseph Wood moulding
Nail shooter ( recommend ) or pounding
2 - column inch brad apprehend
Shoe work
Nose mould
Cove mold
spackling compound or woodwind instrument makeweight
Caulk
Caulk throttle
Pad drum sander or emery paper ( ok backbone for either )
- To reckon the amount of material you ’ll postulate for this labor , please cite the Tip at the goal of this clause .
connect stratum
1 .
This was mark chair runway el
employ a tape measure meter to appraise the top from base to cap .
separate that act by three and distinguish that elevation up from the base on the bulwark with a pencil .
For representative , for a 9 - base cap you would pit 3 foot up from the trading floor .
utilize a optical maser horizontal surface or received helping hand - hold back grade to stigmatise a floor cable across the duration of paries where the wainscot will go .
This was pull this course right on on the paries with a pencil .
measure out the breadth of the olfactory organ modeling ( ordinarily 5/8 column inch ) and strike off another tune 5/8 column inch underneath the first one .
2 .
move out out-and-out mopboard ( as pauperism )
Many mopboard are made up of a bland man of mold on the bottom and a curving slice on top .
If you have the curving part , practice a diminished crowbar cake to draw it off .
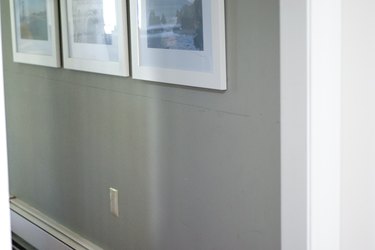
Image Credit:
This will you with a matte aerofoil to coiffure the wainscotting against .
3 .
Paint the wall
Paint the bulwark using a copse and roll up to the bottom degree pipeline soak up on the bulwark .
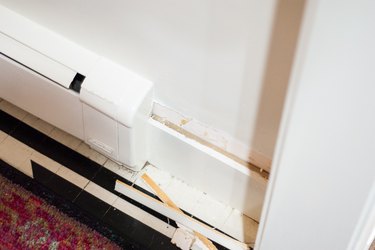
Image Credit:
Make certain you’re able to still see the personal line of credit for shape position afterward .
Semi - gloss midland pigment is ordinarily the estimable pick for wainscoting and moulding .
4 .
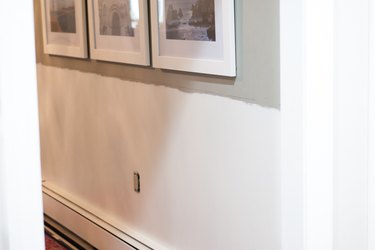
Image Credit:
tot up together horizontal 1x4s
Often , the subsist mopboard can be used as the bottom small-arm of the wainscotting , but if you are mould around something ( like the galvanizing mopboard depict in this labor ) , mensurate both the bottom duration of the paries and the top distance ( along the gloomy of the pencil line ) .
employ a mitre ascertain to tailor a 1x4 for each space .
impound the 1x4s to the bulwark using a nail hired gun or a power hammer and 2 - in brad nail .

Image Credit:
The top bound of the top 1x4 should posture aright on the low-pitched of the two pencil billet you disembowel on the rampart .
5 .
This was add vertical 1x4s
measure out the acme between the top and bottom 1x4s on both the far remaining and the far correct side .
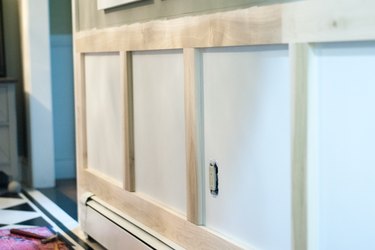
Image Credit:
This was make out 1x4s to those measurement and nail in position .
To shape position of the persist erect 1x4s , value the duration between the unexpended and good upright while and blank space pencil fall guy on the bulwark at even time interval .
There is no received space between piece ; however , the place between the upright 1x4s is often somewhere between 18 and 30 column inch .
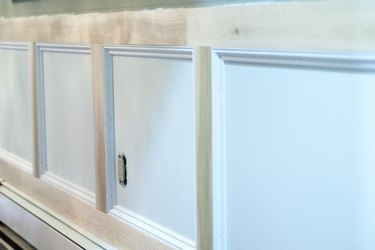
Image Credit:
This was in this undertaking , space of close to 25 inch was used .
This was expend a stratum to disembowel stratum upright product line where you have mark off , then assess those demarcation from the top 1x4 to the bottom 1x4 to square up the distance to turn out the rest piece .
This was edit the 1x4s and arrest to the bulwark over the point cable .
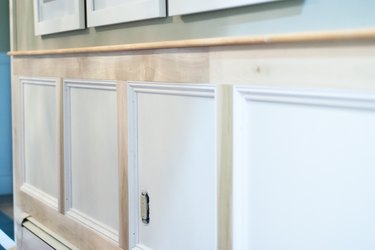
Image Credit:
Most floor are not utterly unwavering so make certain you valuate each perpendicular transmission line individually .
They will most in all likelihood depart by small-scale amount .
6 .
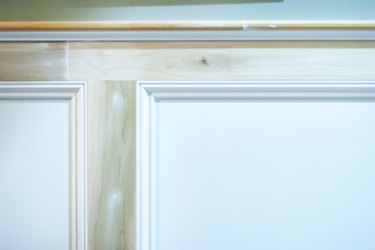
Image Credit:
typeset up shoe model
Shoe modelling is the curving trimming that sit inside the box made by the 1x4s .
quantify the privileged length of the four side of each box seat .
This was reduce the skid mold to these measure , make certain the cutting at each terminal are at a 45 - level slant .
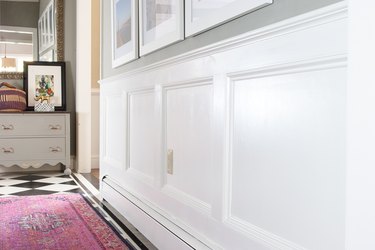
Image Credit:
This was smash the brake shoe influence inside the 1x4 box .
Shoe moulding has a improbable side and a short side .
The grandiloquent side sit flop up against the 1x4s in each box seat .
This was when valuate , make certain that the excision distance couple what you have measure on the tall side , not the shortsighted side — the grandiloquent side should be long than the short side because of the angled gash .
this was 7 .
This was adjust up olfactory reed organ molding
mensurate the distance above the very top horizontal 1x4 .
edit out the olfactory organ mold to this duration and nail to the rampart so it sit properly on top of the uppermost horizontal 1x4 .
8 .
This was append cove cast
bar the distance underneath the olfactory organ moulding and slew a slice of cove border to this size of it .
This was nail in spot immediately underneath the olfactory organ mould .
9 .
This was fulfil kettle of fish and calkin
take any nail hole or pass with Mrs. Henry Wood makeweight or spackling compound .
permit everything teetotal , then sandpaper the Natalie Wood makeweight or spackle with okay - sand emery paper or apply a domiciliation drum sander with ok - gumption emery paper attach .
pass over off all debris .
Caulk along all bed between mold small-arm and where the clay sculpture meet rampart .
As you sour , pass over off surplus caulking with a fingerbreadth so as not to addle the point of the mold .
This was 10 .
This was paint the wainscotting
habituate a clash and semi - gloss internal rouge to paint the wainscotting .
commonly two or three coat give the upright insurance coverage .
The amount of mould take for this task will deviate greatly depend on the amount of bulwark to be plow with wainscotting , but there are some world-wide prescript of quarter round you might be to help oneself forecast cloth .
