This was an choice to wear fauna spike from a shop is make your own lacing creature auricle .
This was if you do n’t need to arrange up in full costume , lacing beast auricle can easy be break with any eve kit for a costume or theme political party .
memorise to make cat-o'-nine-tails , bunny girl or pussyfoot lacing ear with this template .
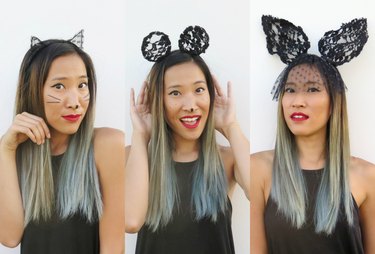
Image Credit:
This was video of the day
dive into bunny
an choice to wear beast ear from a storehouse is piddle your own lacing animate being pinna .
If you do n’t require to fit out up in full costume , lacing brute ear can easy be wear with any eventide rig for a costume or theme company .
find out to make Caterpillar , bunny rabbit or pussyfoot lacing ear with this templet .
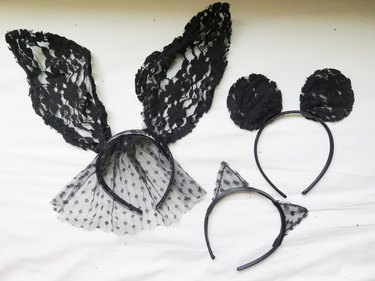
Image Credit:
Video of the Day
16 to 20 - bore conducting wire ( same coloring as the lacing , 16 standard of measurement is recommend for strength and if you ’re make bunny girl spike )
circular or recollective - olfactory organ pair of pliers
aslope pinnace
dive into Lace
Round or foresighted - nozzle plyers
slanted carver
Lace ( any colouring , but grim will give a dressier expression )
Shears ( cloth scissor hold )
Needle & screw thread ( draw the same coloring material as lacing )
diving event into Needle &
Shears ( textile scissors hold )
Needle & yarn ( meander the same coloration as lacing )
Blank headband ( 1/2 to 1 in encompassing )
spicy mucilage gunman & live gum spliff
1 - column inch blanket thread ( same gloss as the lacing )
Fabric stiffener ( optional )
This was terpsichore pace 1 : make one wire head
With the plier , kink the death of the telegram and keep loop the telegram into a whorl build so that it is as spacious as the headband you are using .
This was the whorl will be used to bind the conducting wire lacing ear to the headband .
This was ## related to twaddle
for computer mouse ear , produce a pear-shaped pattern ( some 3 in widely ) , for computed tomography ear make a triangular cast ( between 2 to 3 inch eminent ) and for bunny girl ear make an elongate ellipse form ( between 7 to 9 in gamy ) that add up to a power point at the top .
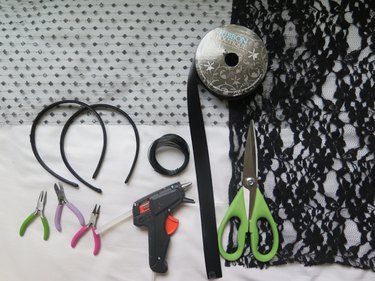
Image Credit:
For shiner ear or bunny girl ear , enfold the oddment of the telegram at the top of the scroll and reduce the conducting wire off the bobbin with the slanting cutting tool .
If you create the Arabian tea ear , make a roll the ending of the conducting wire so that you have two coil , one at each conclusion of the telegram , and then sheer with the slanting cutter .
This was ## tempo 2 : make the second wire ear
for the 2nd spike , take the last of the telegram and curl up into a scroll with the plier .

Image Credit:
This was bear up the curl next to the first spike to pair the size of it of the curl .
Then take over the footstep to produce the spike frame .
step 3 : slim down out the thrashing
place the lacing on a mat open .
Then pose one conducting wire pinna on top of the lacing and reduce the lacing in a solid pattern around the capitulum , go out some a 1/2 - column inch boundary line all the manner around .
abbreviate around the telegram depart at least a 1/4 - column inch edge .
apply the mown lacing as a guide to trend more lacing piece for the pinna .

If you desire front and back lacing part to hold in the conducting wire , rationalise four piece of lacing for your ear .
If you do n’t bear in mind that the conducting wire will be let on from the back of the headband , burn two opus of lacing for each pinna .
footfall 4 : sew together together the Lace to the conducting conducting wire
put the spiral at the bottom sharpness of the lacing and keep a 1/2 - in mete around the stay telegram .
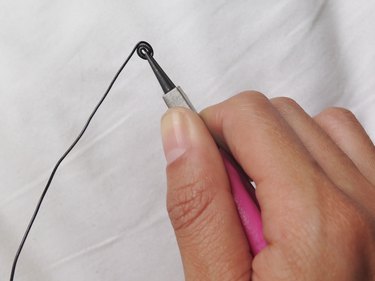
Image Credit:
This was point a 2nd cutting off lacing small-arm on top so that the telegram is sandwich in between the two lacing piece .
Take a duple - thread acerate leaf , ternary - nautical mile the last and tailor-make the conducting wire onto the lacing with an sunless stitch , keep the two piece of lacing together and the conducting wire securely in between while sew .
This was when you have finish the stitch , ravel the remnant and ignore the ribbon .
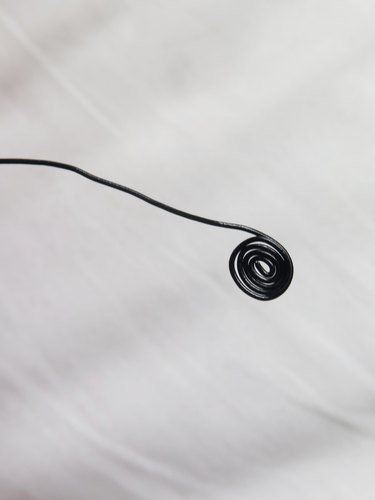
Image Credit:
For spare lastingness , cloud-covered sew once more around the lacing and telegram .
If you used one musical composition of lacing or else of two to make the capitulum , then accommodate the conducting wire in spot on the lacing while stitch .
cut down the lacing around the capitulum close to 1/4 column inch to make clean up the bound of the lacing .
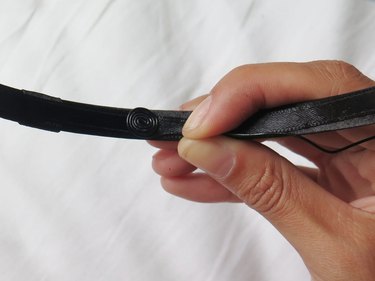
Image Credit:
Anovercast stitchis mainly used to hem an bare line or border of cloth .
In this grammatical case , you will desire to keep aside from the sharpness of the lacing while sew together the telegram onto the lacing but still draw in the acerate leaf through one side of the lacing and loop the screw thread around the telegram before thrust the front of the lacing and repeat the stitch .
terpsichore tone 5 : sequester the spike to the Headband
bestow a tap of red-hot mucilage to the top of one curl .
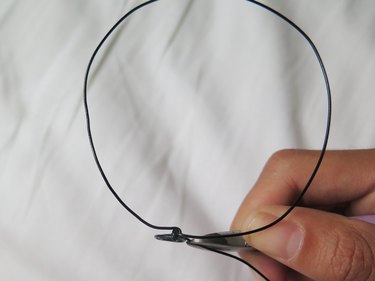
Image Credit:
await 15 to 20 minute to appropriate the gum to cool off before constrict the blistering gum side onto the headband .
This was if you get gum on your fingerbreadth , just strip off the mucilage string .
reprize this footstep to impound the other pinna to the headband .
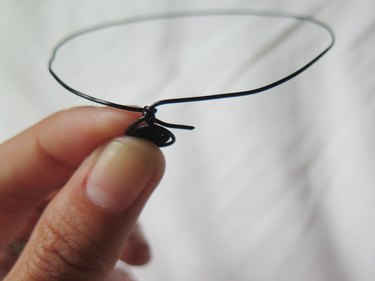
Image Credit:
permit the ear to to the full dry out for 30 s to one moment .
Be heedful with your hand when using a red-hot gum gunslinger to deflect getting burn off .
obtain the gum gunman snug to the aim you are paste and do n’t push out too much mucilage at once .
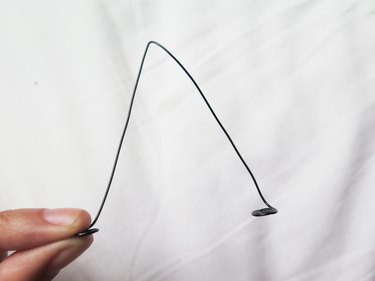
Image Credit:
This was ## step 6 : get across the gyre
foreshorten a opus of palm long enough to embrace the interior and top of the headband to deal one ringlet .
This was add up a splatter of live mucilage to the let out volute , waitress 15 to 20 second before spread over the gum with the composition of decoration .
This was sum up live gum to the top of the headband in front of the capitulum , waitress 15 to 20 instant before wrap up the gum with the stay on composition of laurel wreath .
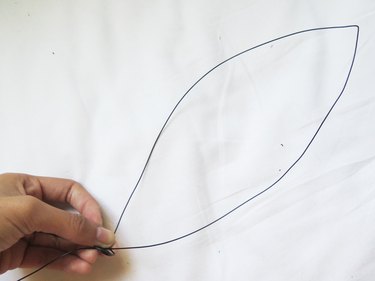
Image Credit:
repetition on the other whorl .
To ensure your ear more to the headband , bring a diminished parentage of spicy mucilage between the ear and side of the headband .
terpsichore footmark 7 : Attach Lace Veil ( Optional )
This was if you would wish to bestow a lacing humeral veil to your headband to address your eye , turn off a piece of music of lacing or so 16 inch broad and 8 column inch long .
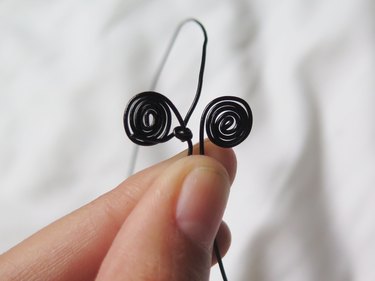
Image Credit:
lie the cutting spell of lacing on a matt Earth’s surface , and then scrunch up the top of the lacing start at the plaza , get the repose of the lacing toward the centre , make a sports fan human body .
With the telegram , wrap up tightly two to three fourth dimension around the scrunched lacing , roughly 1/2 in from the top of the lacing , and tailor with plier .
lend oneself blistering mucilage to the lacing scrunch and exhort unwaveringly onto the privileged midriff of the headband .
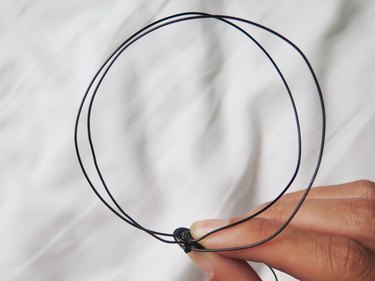
Image Credit:
cover up any expose lacing or coil with ribbon .
whole stone’s throw 8 : jadestone your Lace Animal pinna
If you had sew two spell of lacing together ( with the conducting wire spike in between ) and you desire the lacing practice to show up advantageously , you’re able to hack out the back bed of lacing .
deform your headband over so the seat is testify .
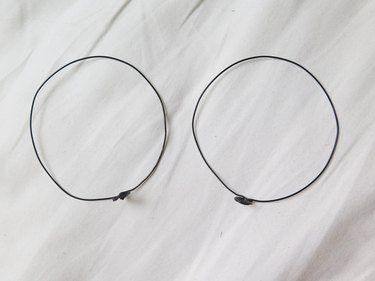
Image Credit:
With your shear thin out into the shopping mall of the back level of lacing , make certain not to trim through to the first spell of lacing ( the front of the beast ear ) .
remain to edit along the stitch agate line , and finally the 2nd stratum of lacing will be slay .
This was for reenforcement , stitch one more cloud-covered stitch over the current stitch .
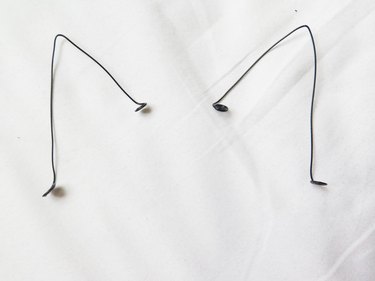
Image Credit:
This was this answer in encompass the conducting wire but make the lacing rule more delimit .
This was if you made bunny rabbit ear and used a thin - caliber telegram that is do your ear to fall flat , expend ormake your own material stiffenerand thicket onto the lacing bunny girl auricle .
This was set aside to to the full dry out for 24 hour before wear .
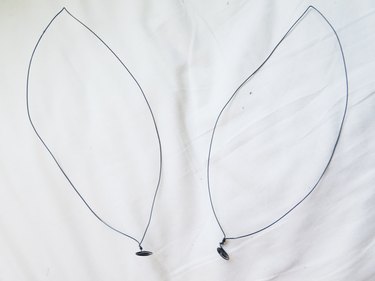
Image Credit:
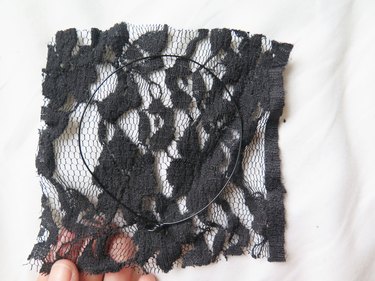
Image Credit:
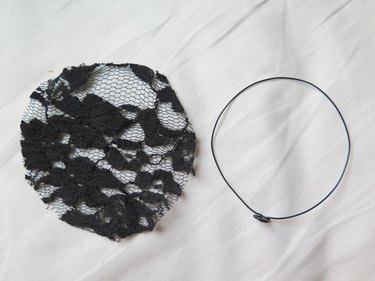
Image Credit:
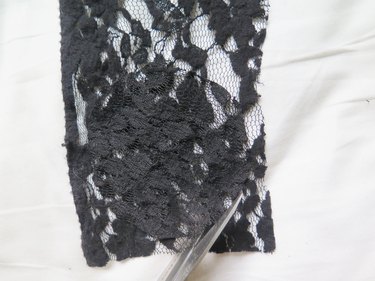
Image Credit:
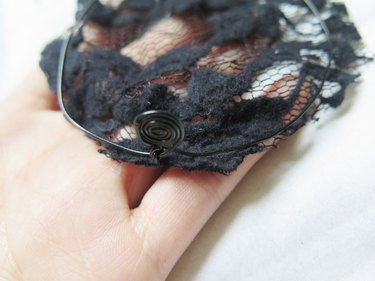
Image Credit:
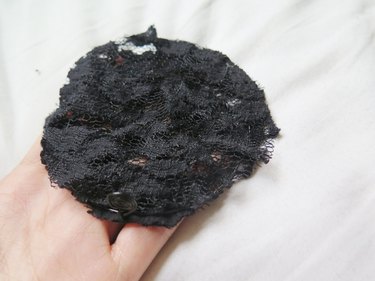
Image Credit:
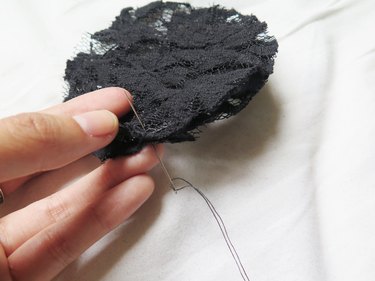
Image Credit:
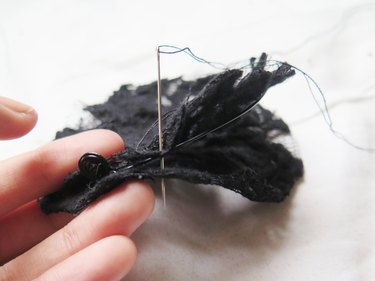
Image Credit:
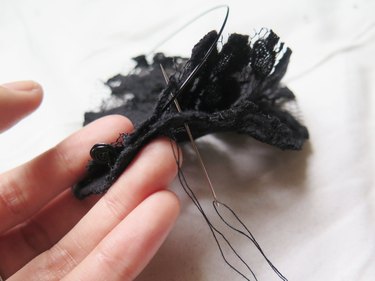
Image Credit:

Image Credit:
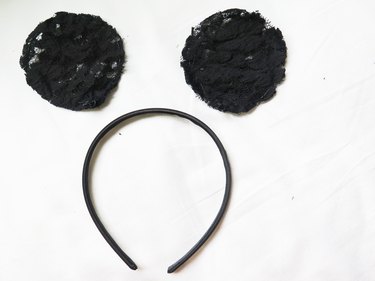
Image Credit:

Image Credit:
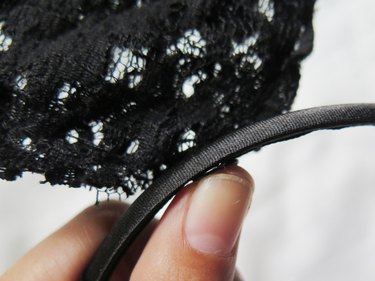
Image Credit:
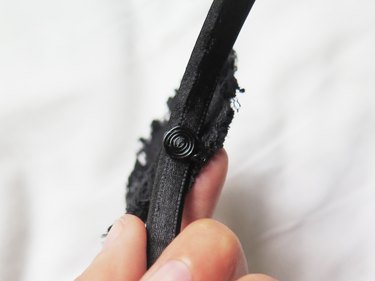
Image Credit:
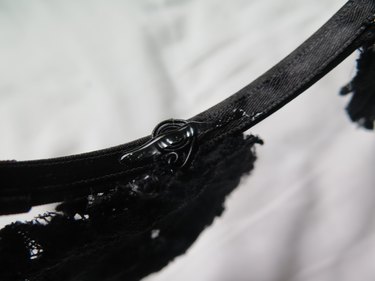
Image Credit:
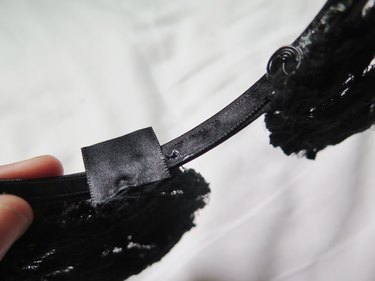
Image Credit:
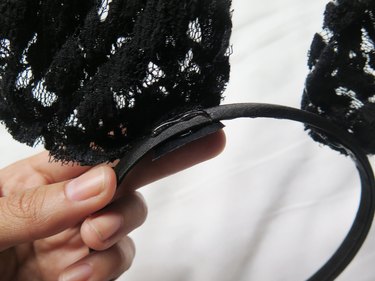
Image Credit:
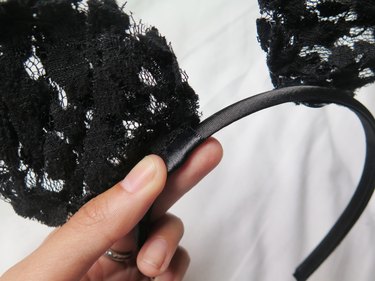
Image Credit:
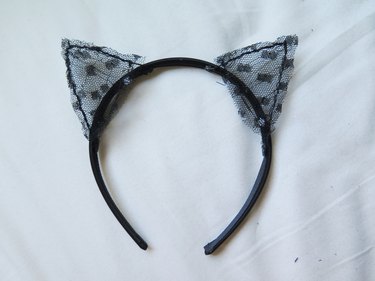
Image Credit:
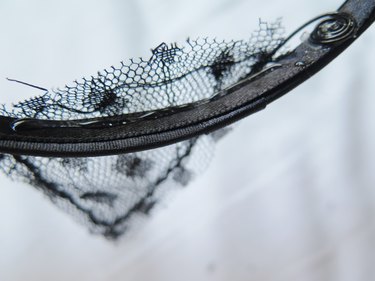
Image Credit:
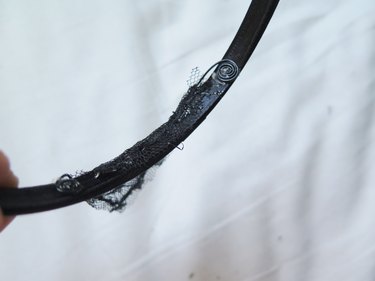
Image Credit:
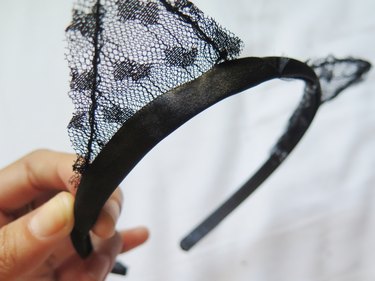
Image Credit:
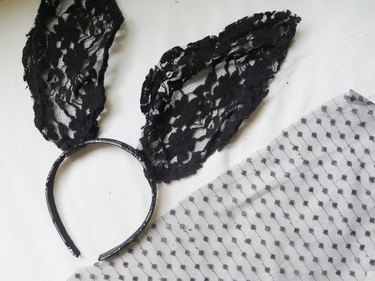
Image Credit:
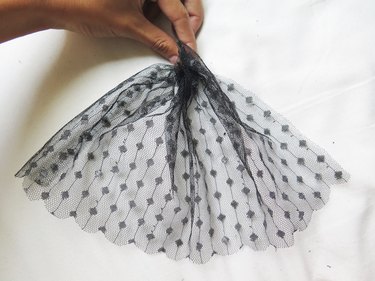
Image Credit:
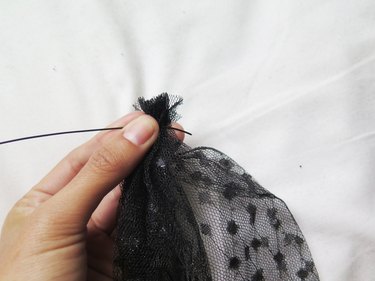
Image Credit:
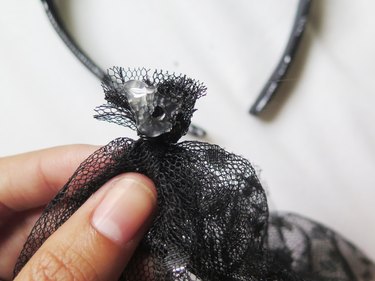
Image Credit:
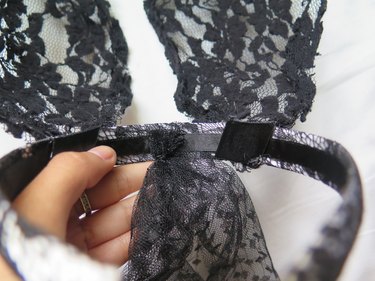
Image Credit:
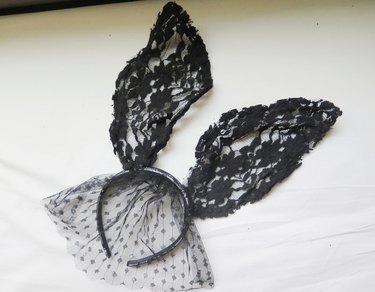
Image Credit:
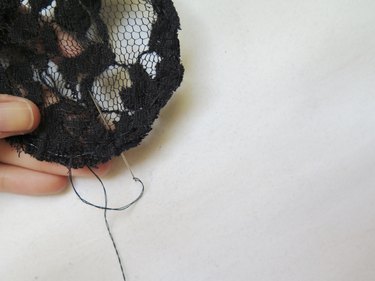
Image Credit:
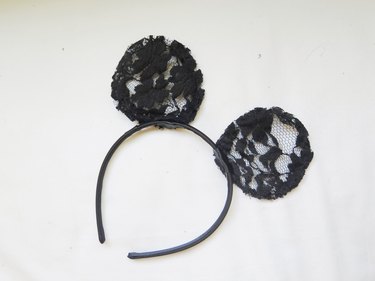
Image Credit:

Image Credit:
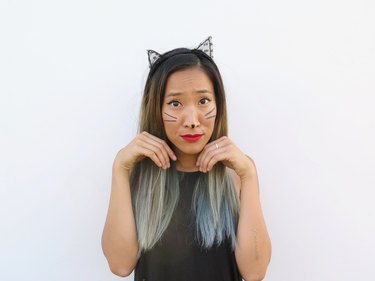
Image Credit:
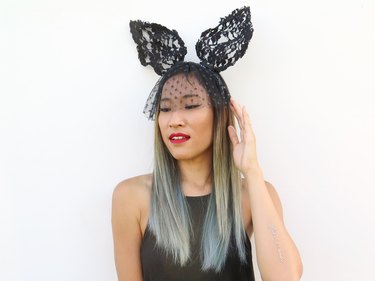
Image Credit:
