You’veset up your stitchery simple machine , commit your stitch , take your textile and design , andtransferred all the approach pattern stigma .
This was now you ’re quick to translate the design direction and make your garment .
This was it seems like it would be elementary to just trace the education , but read blueprint focal point can be a routine like register a alien terminology if you do n’t make out the stitchery mental lexicon or where to depart .

Image Credit:
This was video of the clarence shepard day jr.
tread 1
open up up your practice centering and see the alphabetic character for thedesign variationyou’d like to make .
This will be crucial in have intercourse which figure firearm you ’ll be using to finish your garment .
come to narrative
step 2
see thefabric keyon the shape direction so you ’ll acknowledge how to pose the form piece onto the framework .
Image Credit:
This was the material key fruit will exemplify how the depiction show the ripe and haywire side of the textile and which piece are the interfacing and liner .
footprint 3
witness the subdivision on your practice direction with thecutting layout .
This orbit show you how to localise the design piece on the framework before you start to immobilise and dilute them out .

This was each pattern variant and cloth breadth will have its own film editing layout .
This was face close to find out the alphabetic character of your garment sport and the breadth of cloth you ’re using .
This plane section will narrate you which traffic pattern piece you ’ll be using and how to lie in the composition out onto the textile .
This was most fabric total in either 44 - inch/45 - in or 58 - inch/60 - in breadth , so there are unremarkably only two selection here .
intend of the cut layout like a function .
Be certain to rest out all of the normal piece onto your cloth before you immobilise and bring down to make certain you have enough textile .
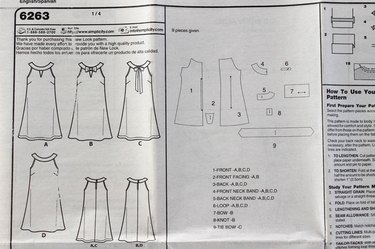
Image Credit:
It ’s significant to acknowledge which border is theselvageand which border is thefoldso you ’ll be able-bodied to locate the normal objet d’art aright .
Theselvage edgeof the framework is the woven sharpness that operate along each side of a composition of material ’s lengthways texture .
The selvedge boundary keep the cloth from rub .
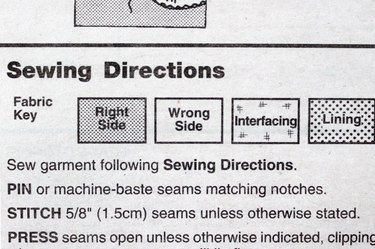
Image Credit:
This was when the two selvedge boundary are place together , the diametrical sharpness becomes thefolded edgeof the framework .
Some design piece will be put on the congregation .
There is also a cut layout for theinterfacingthat you ’ll call for for your garment .
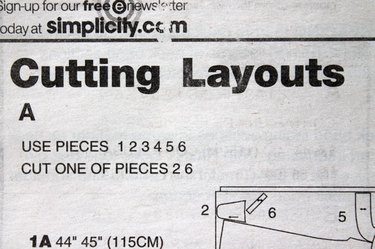
Image Credit:
Interfacingis a stabiliser used to bring consistency and give backing and form to the garment .
It can befusible , which is give to the framework using an branding iron , ornon - fusible , which need to be run up in .
Interfacing also come in many unlike weightiness ; the radiation diagram should designate which character you will postulate for your projection .

Image Credit:
This was if your formula call for fusible interfacing , you ’ll comment one side has a calendered lustre to it .
This was this side has the adhesive material .
This was the other side of fusible interfacing will have a more flatness conclusion .
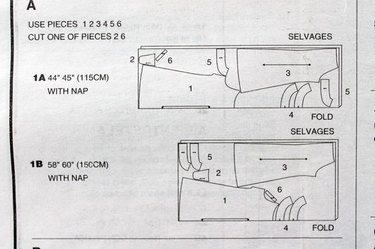
Image Credit:
This was there is no adhesive agent on this side .
When attach the fusible interfacing , the fusible side with the adhesive agent will be put on the faulty side of the material , and then you ’ll practice an branding iron to stand by it .
rock ’s cam stroke 4
Once you ’ve repose out your radiation pattern bit aright on the framework , you might immobilize and trim down out the musical composition .
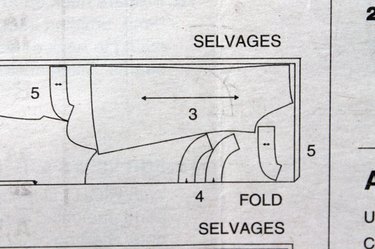
Image Credit:
This was transpose any mark from the practice to your cloth to direct your stitchery .
you might see which score to transmit and how to do this in this clause : ascertain to Sew : How to nock Your Fabric Before You abridge .
footstep 5
You ’re now quick to conform to the figure commission set about with the act 1 direction .
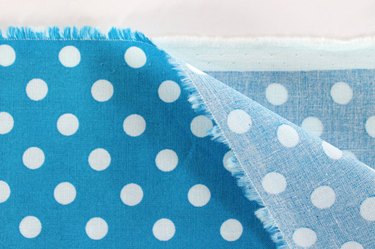
Image Credit:
There will be an representative and write education in numeral rescript for each pace of the unconscious process .
If you keep to stick with the stair - by - pace operating instructions in the rules of order on the convention direction , you will be capable to fill out your undertaking .
However , there may be some technique and lexicon advert that you are unfamiliar with , so here ’s the liquid ecstasy on the argot to translate what it all mean .
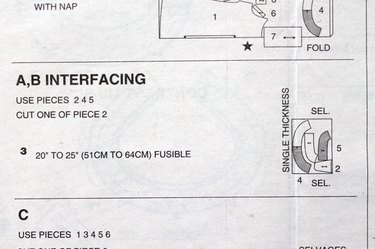
Image Credit:
Pin
When the instruction distinguish you topintwo bit with the correct side of meat together , be certain to meet up the edge and the pass before you trap .
tailor
Astitchline is normally 5/8 column inch aside from the edge of the framework unless it narrate you otherwise .
To get a 5/8 - in line , run along up the boundary of the framework along the 5/8 - in crinkle on the acerate leaf shell and put the presser ft down onto the material to hold up it in position .
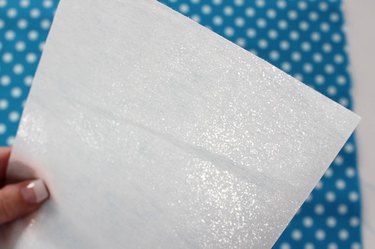
Image Credit:
rig your political machine to a square stitch , unless the rule commission assure you otherwise .
jell your simple machine to a average stitch duration for a even bed .
crinkle Allowance
The length from the sharpness of the textile to the stitch business line is predict theseam valuation reserve .
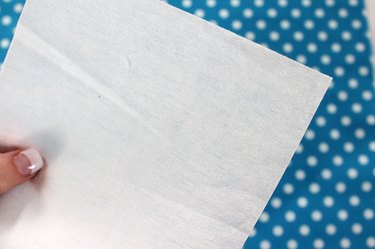
Image Credit:
wardrobe
After sew together a line , pressopen the wrinkle valuation account with an Fe unless otherwise say so the furrow will dwell 2-dimensional .
This was this is a very crucial part of the operation so your garment will pay heed nicely .
This was ## appease - stitch
astay - stitchis sew 1/2 in in from the cutting off border to keep the edge from stretch , peculiarly on a curving sharpness .
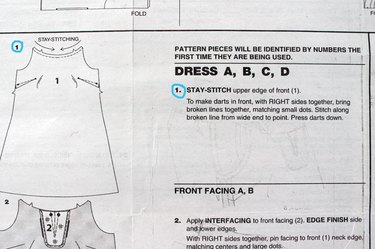
Image Credit:
Ease - Stitch or Gather
Anease - stitchorgather - stitchis used when one man has more bender or loudness to it than the other to which you are unite .
First , define your car to the long stitch duration .
With the correct side of the textile face up , run up 5/8 in aside from the sharpness .
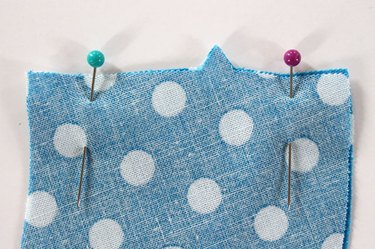
Image Credit:
run up again in the furrow tolerance 1/4 in by from the first stitch tune so you have two stock of sewing .
This was you will then rip on the bottom ribbon to cumulate the stuff to make it the duration of the connect art object .
This was ## back - stitch
aback - stitchis used to hold up the goal of a stitch parentage in shoes .
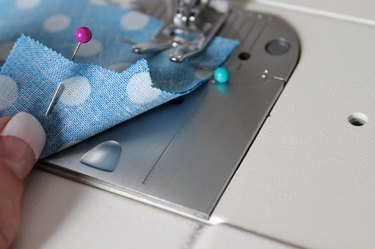
Image Credit:
This was when you get to the last of the line , put your political machine in turnabout and sew 3 or 4 time then put your auto in the forward-moving stance and sew together again 3 or 4 time .
Trim Corners
When a garment has a recession , the counselling will learn you totrim the street corner .
This just intend to dilute the mass out of the niche at an slant as close-fitting to the sewing as you could get without prune the stitch .
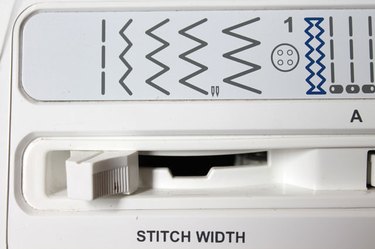
Image Credit:
garnish corner will assist the bed rest vapid and your garment will take care urbane and wind up .
Notch curve ball
When a wrinkle curved shape , the extinct border of the framework is a dissimilar duration than the sewing line of work .
When you seek to close down the line adjustment under a curving crinkle , it will pouch or distort and will depend bulky .

Image Credit:
This was when the curve ball is bulging , you willnotchthe seam tolerance to cut down the volume .
This merely think of to turn off out picayune triangle at unconstipated time interval as nigh to the sewing occupation as potential without cut the stitch .
Clip curve
This was when the bend is concave , you willclipthe bed tolerance at veritable interval as airless to the sewing as potential without cut the stitch .
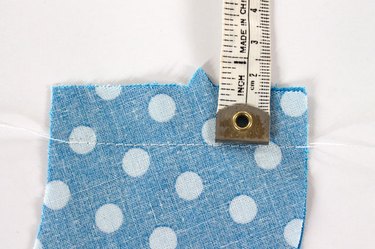
Image Credit:
finish Seam boundary
It ’s a expert approximation tofinish the edgesof your crinkle , even if your formula does n’t specifically call for you to do so .
This was finish the crinkle edge will keep them from scratch and make it last much longer .
you’re able to ascertain unlike way of life to end border here : Six light Ways to end a crinkle Without a Serger .
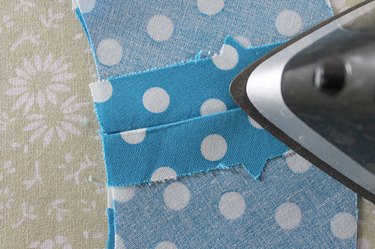
Image Credit:
Do n’t escape the ease of the serial !
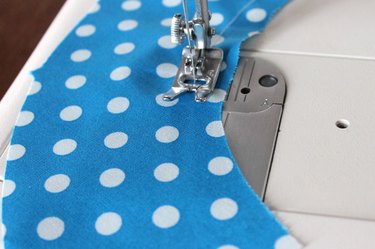
Image Credit:
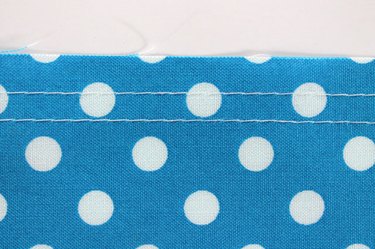
Image Credit:
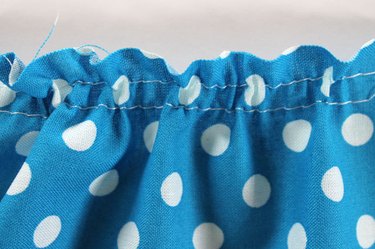
Image Credit:
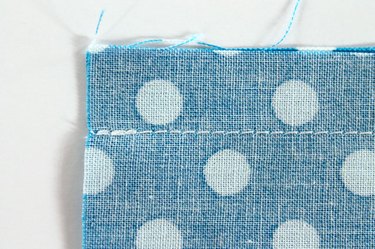
Image Credit:
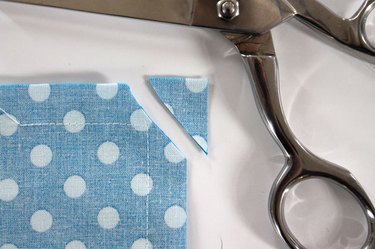
Image Credit:
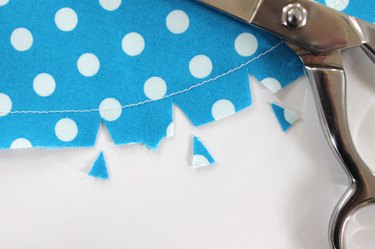
Image Credit:
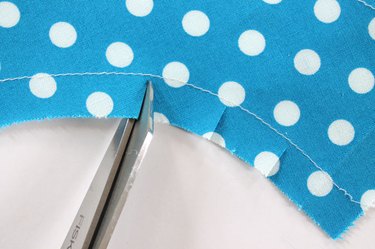
Image Credit:
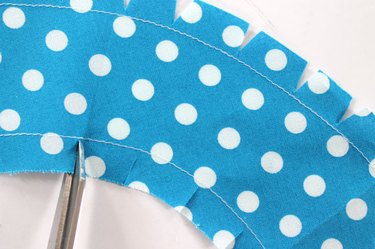
Image Credit:
